Showing posts with label projects. Show all posts

Wednesday, August 30, 2017

While the Cat's Away

Carson had a busy travel month! He went back to Berlin at the beginning of the month, and then out to the West Coast at the end of it. I stayed behind while he enjoyed a rafting trip, and here's what I did! (Pictures of his more exciting adventures to come, when I get copies of his pictures)

I saw him off! It also happened to be my first day back to work!

Saw the 2017 Solar Eclipse! We had 86% coverage here in Tallahassee, so we got a good view, and the sky turned eerily dark-yet-bright, but nothing like they had in the Carolinas.

I went through exactly one day of training for my old job, and then they got me out of it! It had been over a year since I'd worked, so technically I needed to do it, but then again, I knew what to do and they needed me so... I didn't have to do it. 

We bought a rug and it was delivered while Carson was gone! I dragged this behemoth into the apartment and rolled it out by myself. I don't know if you've had the pleasure of trying to put a rug underneath a table, but it was definitely a challenge.


My friend Christina does girls' retreats all over the US and in several places around the world, so we helped her pack some gifts for her upcoming trip to Swaziland.

I made caramel in the crockpot! All you do is put a sealed can of condensed milk (wrapper off) into the crockpot, cover with water, and cook on low for 8 hours. After it's cooked, take it out and put it in the fridge for at least 2 hours. I did mine overnight and popped it in the fridge before work in the morning. It was GOOD and I'm not a super caramel fan; I just wanted to see if it works (Carson loves all things sweet, so don't worry, he loved this experiment!).

I bought two crates at Jo-Ann Fabrics and used some leftover paint to make a cheap nightstand. Glued them together with wood glue (instead of a clamp, I piled books inside to help the glue stay) and then did one final coat when it was all together. This may not be my forever nightstand, but it was much better than the box I was using before!


I went through stuff and threw things away or donated - here's nail polish I got rid of!

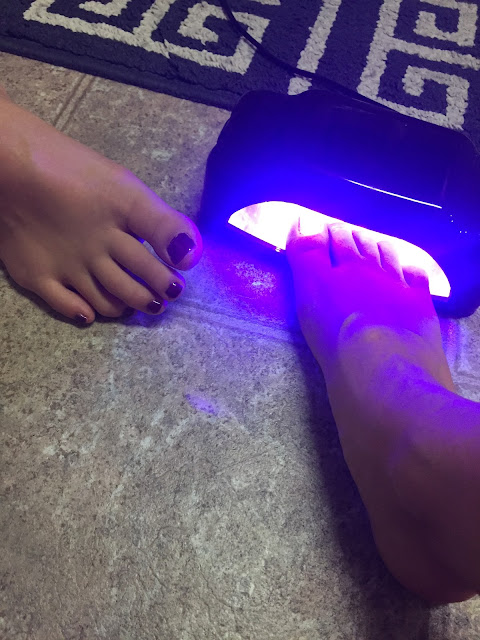
I spent a good amount of time with Christina and Josh. They live right across the street, and so I went over there a few times, or we'd meet at the gym for a workout. One night we used her gel nail stuff and did our fingers and toes. I think this thing is so cool.

On Sunday, Christina and I went to church together and then ran to Target for a few things for her trip. She had a gift card and offered to buy my Starbucks drink - it's been awhile since I've been there!

After our Target run, we went to the Pitaria, a really delicious Gyro place. 


 I made a wifi sign for our guest room.

Meanwhile this is how that room looked!

I was adjusting something and this metal pipe snapped!

Maintenance took care of it within a day which was such a relief!

 This bookcase has been such a dark hole in our living room, so I'd planned to whitewash it, but when I got started, I realized that painting it was probably a better way to go. It looks much better now.


And the day Christina left for Africa, I had the day off, so we met at the gym and then walked around Lake Ella together before she flew out!


Finally, 8 days after he'd left, Carson returned! The house looked totally different because the boxes were unpacked and things were on the walls and I'd made two trips to Goodwill with things we no longer needed, so there was just less to clutter our place. 

Picked him up from school after work on a rainy Tuesday!


Pictures of the updated apartment and more coming soon!

Monday, June 13, 2016

IKEA Lack Table Update

When we first got married, we used a black leather storage cube for a coffee table. It wasn't perfect, but it worked: it was a place to put drinks, our tv (and by "tv", I obviously mean "laptop"), and most importantly, it was small, and so was our little apartment. 

In Cleveland, Carson found a secondhand chest that we used as a coffee table for about three and a half years. It was slightly larger and could hold some appetizers for community groups, doubled as seating, and held extra blankets. We stripped and stained the chest earlier this year and even though I liked it before, I really love it now! 

I wanted a real coffee table though. A big reason was that the chest was obviously used for storage, and it was a little annoying to have dinner (oh yeah, we also used it as a table) sitting on the table and then need a blanket. It was also a little small. 

We looked at thrift stores for coffee tables but I really wanted something pretty big, nothing with glass, and a fairly simple design. I was drawn to something industrial or farmhouse - and nothing at thrift stores caught my eye. 

So in February, we bought the IKEA Lack Table. It was cheaper than buying the supplies to make a whole table, but we'd have the ability to modify it if we wanted. We'd been meaning to get around to modifying it since then, but our weekends have been full, so we finally got around to it in June... what's four months? 


We picked out 1x4s at Lowes (Carson inspected to make sure they were mostly straight). 

We got nine boards, and they didn't have to be cut at all, which was terrific!


Carson put one coat of Minwax Dark Walnut on the boards and wiped them off. He'd paint it on one, paint it on the next, then wipe off the first one to give it a little chance to soak in. 

The nice thing about Carson running point on this project is that he does things a lot more carefully than I do. Like measuring instead of eyeballing, and knowing to buy the gun thing for the glue. 

The cheapest place we found clamps was at Walmart. Carson seemed to think that they were a screaming deal. So go there if you need clamps. 


The glue might have been good enough alone, but to be safe, Carson drilled some screws into the bottom of the table to secure everything. Genius.

Here it is! Isn't it pretty!

We put some weight on the table to prevent any warping. I have no idea if it helped (and we did put more weight than just this), but better safe than sorry. 


Thursday, June 2, 2016

Chalk Painted Dresser

Do I have a plan to refinish all the furniture we own? Maybe. 

I received this bedroom set as a gift for my eighteenth birthday. It was secondhand then, and wasn't in the best shape, but nine years later, it was time to make it pretty again. I really wanted to sand and restain the top and paint the bottom, but the top is veneer, so I decided to leave that alone and just paint.

I did this on our sixth anniversary. Carson left for a conference that day and upon dropping him off at the airport, I hit the home improvement stores. I didn't think he'd have a problem with the pieces being finished, but he is a lot more conscientious of the time and work (and lets face it, the mess) that these projects take, so I didn't tell him about it. 

Here's my before, with drawers removed. The dresser you can see in the mirror is part of the same set and I almost tackled the two together but decided ultimately that it would be too much all at once. 

I prepped by wiping the piece down and dusting, as well as emptying out all the drawers. 
There's probably a reason for this, but the top always has this filmy cloudy look to it, and every time I wipe it, the cloths and paper towels I use turn brown. I was excited to get rid of the ugliness. 

Here are my supplies, with one exception. That wood putty is completely the wrong thing. The one I bought doesn't dry for some reason, so I had to head back out (grumbling) to get real putty.
No turning back! I bought a big plastic tarp and put it under the dresser and over the end of my bed, since I was painting in my bedroom. One nice and surprising thing about the chalk paint is that there's not really an odor, so painting inside was fine!


I really wanted a stained top and painted bottom to this dresser, but decided to paint it all. 

After three coats (the dark wood needed that many to cover it), I let everything dry with a fan on in the room. It took a very short time for each coat of paint to dry and I think everything was painted and finished in about five hours.

I carefully put the handles back in (some of them had stripped screws so I couldn't remove the pulls and tried my best not to get paint on them). I then gingerly put the drawers back in and called it a night. My room was still a mess (I spent Monday evening sorting through things to give away, keep, and neatly fold back in the drawers), so I slept on the couch.

Not bad for an afternoon though, is it?

Monday, April 11, 2016

DIY Ring Holder

Well here's a little project I started working on in October for Christmas presents. It's a little different, but it was fun and easy and not so expensive. I know it's April, but we gave out the last of our gifts in March, so here you go!

I started with plastic dinosaurs (I bought a pack of 12 on Amazon.com), liquid gold leaf (had left over from a project, but I found it in the paint section at a craft store - spray paint or acrylic paint would be great or even better), 4" clay saucers (found in a pack of 6 for $2.99 at Hobby Lobby), acrylic craft paint, and super glue.

Here we have our dinosaur.

And here we have the dinosaur with the gold leaf.

And HERE, we are painting the dinosaur (I did two coats, and you can use gold leaf or acrylic paint. I just used the gold because I had it.).

Isn't he pretty?

Here they are, drying on my paint palate, a paper plate.

And here we have another dinosaur modeling where he's going to live for the rest of his little plastic life.

I used craft paint to cover the clay saucers. I did some white, and some in other colors. They dried very fast, I think because of the clay. 

Then I glued the little feet of my dinosaur to the saucer and tested him out. It's quirky, right? And kind of fun! You could use any animal that has a part to hold a ring. I used a deer for my "deer cousin" Morgan and thought other animals would be fun as well. 
Related Posts with Thumbnails Follow Me on Pinterest